| 일 | 월 | 화 | 수 | 목 | 금 | 토 |
|---|---|---|---|---|---|---|
| 1 | 2 | 3 | 4 | 5 | 6 | 7 |
| 8 | 9 | 10 | 11 | 12 | 13 | 14 |
| 15 | 16 | 17 | 18 | 19 | 20 | 21 |
| 22 | 23 | 24 | 25 | 26 | 27 | 28 |
| 29 | 30 | 31 |
- 예제중심HTML&자바스크립트&CSS
- Apache
- Crawling
- image
- 소스설치
- Selenium
- 한빛아카데미
- 논문리뷰
- aws
- deeplearning
- MySQL
- 한빛미디어
- 비지도학습
- 생활코딩
- 컴파일설치
- jupyter
- Lamp
- attention
- 수동설치
- AndroidStudio를활용한안드로이드프로그래밍
- 밑바닥부터시작하는딥러닝
- 프로그램새내기를위한자바언어프로그래밍
- 밑바닥부터시작하는딥러닝2
- word2vec
- 가비아
- CBOW
- 크롤링
- 셀레니움
- 딥러닝
- 머신러닝
- Today
- Total
안녕, 세상!
9. 그래픽 본문
(1) 그래픽
안드로이드는 다양한 도형을 그리는 방식을 제공하고 관련 메소드에서 좌표를 직접 입력해서 그릴 수도 있고, 화면을 손가락으로 터치해서 그릴 수 도 있습니다.
① 캔버스와 페인트
화면에 도형을 그릴 때 사용하는 클래스는 Canvas와 Paint입니다.
Canvas는 도화지 역할을 하며, Paint는 붓 역할을 합니다.
android.graphics.Canvas 클래스에서 점을 찍는 메소드의 원형은 다음과 같습니다.
public void drawPoint (float x, float y, Paint paint)
android.graphics.Paint 클래스에서 색상을 지정하는 메소드의 원형은 다음과 같습니다.
public void setColor (int color)
② 그래픽 처리
그래픽을 표현할 때 View 클래스를 재정의하는 형태로 자주 사용되는데 그 틀의 형식은 다음과 같습니다.
public void onCreate(Bundle savedInstanceState) {
super.onCreate(savedInstanceState);
setCountView(new 재정의한 클래스 이름(this));
}
private static class 재정의한 클래스 이름 extends View {
public 재정의한 클래스 이름(Context context) {
super(context);
}
@Override
protected void onDraw(Canvas canvas) {
super.onDraw(canvas);
....화면에 그려질 내용을 이곳에 코딩
}
}
다음은 그래픽 기본 java 예제입니다.
MainActivity.java
|
1
2
3
4
5
6
7
8
9
10
11
12
13
14
15
16
17
18
19
20
21
22
23
24
25
26
27
28
29
30
31
32
33
34
35
36
37
38
39
40
41
42
43
44
45
46
47
48
49
50
51
52
53
54
55
56
57
58
59
60
61
62
|
import androidx.appcompat.app.AppCompatActivity;
import android.content.Context;
import android.graphics.Canvas;
import android.graphics.Color;
import android.graphics.Paint;
import android.graphics.Path;
import android.graphics.Rect;
import android.graphics.RectF;
import android.os.Bundle;
import android.view.View;
public class MainActivity extends AppCompatActivity {
@Override
protected void onCreate(Bundle savedInstanceState) {
super.onCreate(savedInstanceState);
setContentView(new GraphicViewSample(this));
}
private static class GraphicViewSample extends View {
public GraphicViewSample(Context context) {
super(context);
}
@Override
protected void onDraw(Canvas canvas) {
super.onDraw(canvas);
Paint paint = new Paint(); // paint클래스 변수 생성
paint.setAntiAlias(true); // 도형의 끝을 부드럽게 처리해 주는 메소드
paint.setColor(Color.RED);
canvas.drawLine(10,10,200,10,paint); //(10,10)에서 (200,10)까지 paint변수로 직선 그리기
paint.setColor(Color.GREEN);
paint.setStrokeWidth(5); // 그려질 도형 또는 글자의 외곽선 두깨를 결정, 0으로 설정하면 기본인 1px 두께로 그려짐
canvas.drawLine(10,30,200,30,paint);
paint.setColor(Color.BLUE);
paint.setStrokeWidth(0);
paint.setStyle(Paint.Style.FILL); // 도형의 내부를 채울지 여부를 결정. 한 번 설정되면 변경될 때 까지 유지됨
Rect rect1 = new Rect( 10, 50, 10+100, 50+100); // 직사각형 설정 (x축,y축,가로길이,세로길이)
canvas.drawRect(rect1, paint); //직사각형 그리기
paint.setStyle(Paint.Style.STROKE); // 도형의 내부를 비움
RectF rect2 = new RectF(130,50,130+100,50+100); // RectF 클래스는 float형을 가짐 Rect는 int형을 가짐
canvas.drawRoundRect(rect2,30,30,paint); // 모서리가 둥근 사각형, 둥글게 할 x축 y축 반지름 설정, RectF변수 필요
canvas.drawCircle(60,220,50,paint); //원을 그림, ( 원의중심x좌표, 원중심Y좌표, 반지름, Paint형)
Path path1 = new Path(); //android.graphics로 import 하기
path1.moveTo(10,290);
path1.lineTo(10+60,290+60);
path1.lineTo(10+120,290);
path1.lineTo(10+180,290+60);
path1.lineTo(10+240,290); // Path는 여러점을 가진 클래스로 moveTo() 메소드로 해당 점으로 이동한 자취를 남김
canvas.drawPath(path1,paint); // path를 그림
paint.setStyle(Paint.Style.FILL);
paint.setTextSize(35);
canvas.drawText("안녕, 세상!",10,390,paint); // 글자를 그림 (글자, x좌표,y좌표, Paint형)
}
}
}
|
cs |
③ 터치 이벤트
화면에 생성한 뷰를 터치하면 Touch이벤트가 발생합니다.
앞 예제에서는 도형을 그리기 위한 XY좌표로 코드를 직접 입력했지만, 손가락으로 그림을 그리려면 터치 이벤트를 활용해야 됩니다.
터치 구현은 View클래스의 onTouchEvent() 메소드를 오버 라이딩해서 코딩합니다.
형식은 다음과 같습니다.
public boolean onTouchEvent(MotionEvent event) {
switch (event.getAction()) {
case MotionEvent.ACTION_DOWN:
....손가락으로 화면을 누르기 시작했을 때 할 일
break;
case MotionEvent.ACTION_MOVE:
....터치 후 손가락을 움직일 때 할 일
break;
case MotionEvent.ACTION_UP:
....손가락을 화면에서 뗄 때 할 일
case MotionEVENT.ACTION_CANCEL:
....터치가 취소될 때 할 일
break;
default:
break;
}
return true;
}
다음은 도형을 직접 터치해서 그릴 수 있는 예제입니다.
|
1
2
3
4
5
6
7
8
9
10
11
12
13
14
15
16
17
18
19
20
21
22
23
24
25
26
27
28
29
30
31
32
33
34
35
36
37
38
39
40
41
42
43
44
45
46
47
48
49
50
51
52
53
54
55
56
57
58
59
60
61
62
63
64
65
66
67
68
69
70
71
72
73
74
75
76
77
78
79
80
81
82
83
84
85
|
import android.content.Context;
import android.graphics.Canvas;
import android.graphics.Color;
import android.graphics.Paint;
import android.os.Bundle;
import android.view.Menu;
import android.view.MenuItem;
import android.view.MotionEvent;
import android.view.View;
import androidx.appcompat.app.AppCompatActivity;
public class MainActivity extends AppCompatActivity {
final static int LINE=1, CIRCLE=2;
static int Shape = LINE; //선택된 도형이 선인지 원인지 구분해주는 변수 Shape
@Override
protected void onCreate(Bundle savedInstanceState) {
super.onCreate(savedInstanceState);
setContentView(new GraphicViewSample(this));
}
public boolean onCreateOptionsMenu(Menu menu) {
super.onCreateOptionsMenu(menu);
menu.add(0,1,0,"선 그리기");
menu.add(0,2,0,"원 그리기");
return true;
}
public boolean onOptionsItemSelected(MenuItem item) {
switch (item.getItemId()) {
case 1: // 선의 id는 1
Shape = LINE; // 선
return true;
case 2: // 원의 id는 2
Shape = CIRCLE; // 원
return true;
}
return super.onOptionsItemSelected(item);
}
private static class GraphicViewSample extends View {
int startX = -1, startY= -1, stopX= -1, stopY= -1;
public GraphicViewSample(Context context) {
super(context);
}
@Override
public boolean onTouchEvent(MotionEvent event) { // 터치할 때
switch(event.getAction()) {
case MotionEvent.ACTION_DOWN: // 터치 Down 할 경우
startX = (int) event.getX();
startY = (int) event.getY();
break;
case MotionEvent.ACTION_MOVE:
case MotionEvent.ACTION_UP: //move와 up을 동일하게 취급해서 드래그 할 때마다 그려지는 흔적을 보이는 효과를 줌
stopX = (int) event.getX();
stopY = (int) event.getY();
this.invalidate(); // onDraw()메소드 자동으로 실행
break;
}
return true;
}
protected void onDraw(Canvas canvas) {
super.onDraw(canvas);
Paint paint = new Paint();
paint.setAntiAlias(true);
paint.setStrokeWidth(5);
paint.setStyle(Paint.Style.STROKE);
paint.setColor(Color.RED);
switch (Shape) {
case LINE:
canvas.drawLine(startX, startY,stopX, stopY, paint);
break;
case CIRCLE:
int radius = (int) Math.sqrt(Math.pow(stopX-startX,2)+Math.pow(stopY-startY,2));
// 시작점과 끝점의 거리를 계산하여 반지름으로 함
canvas.drawCircle(startX, startY, radius, paint); // 시작점은 원의 중심점으로
break;
}
}
}
}
|
cs |

(2) 이미지
사진과 같은 그림 파일을 안드로이드 화면에 출력할 수 있습니다.
또한 사진에 다양한 효과를 주는 방법도 지원합니다.
① 비트맵의 기본
Bitmap 클래스는 캔버스에 이미지 파일을 보여주는 데 사용됩니다.
형식은 다음과 같습니다.
/res/drawable 폴더에 있는 이미지 파일을 보여주는 onDraw() 메소드
protected void onDraw(Canvas canvas) {
super.onDraw(canvas);
Bitmap picture = BitmapFactory.decodeResource(getResources(), R.drawble.그림id);
canvas.drawBitmap(picture, 시작x, 시작y, null); // 메소드로 화면에 출력할 때 그림의 시작 좌표 설정
picture.recycle(); // Bitmap.recycle() 메소드는 비트맵 리소스를 해제함
}
SD카드의 이미지 파일을 보여주는 onDraw() 메소드
protected void onDraw(Canvas canvas) {
super.onDraw(canvas);
Bitmap picture = BitmapFactory.decodeFile("파일경로 및 파일");
canvas.drawBitmap(picture 시작x, 시작y, null);
picture.recycle():
}
drawBitmap() 메소드로 이미지를 화면에 중앙에 출력하려면 시작x,y 좌표를 다음과 같이 설정하면 됩니다.
시작x = (View폭 - 이미지 폭) / 2
시작y = (View높이 - 이미지 높이) / 2
다음은 화면 중앙에 이미지 파일을 출력하는 코드입니다.
MainActivity.java
|
1
2
3
4
5
6
7
8
9
10
11
12
13
14
15
16
17
18
19
20
21
22
23
24
25
26
27
28
29
30
31
|
import android.content.Context;
import android.graphics.Bitmap;
import android.graphics.BitmapFactory;
import android.graphics.Canvas;
import android.os.Bundle;
import android.view.View;
import androidx.appcompat.app.AppCompatActivity;
public class MainActivity extends AppCompatActivity {
@Override
protected void onCreate(Bundle savedInstanceState) {
super.onCreate(savedInstanceState);
setContentView(new GraphicViewSample(this));
}
private static class GraphicViewSample extends View {
public GraphicViewSample(Context context) {
super(context);
}
protected void onDraw(Canvas canvas) {
super.onDraw(canvas);
Bitmap picture = BitmapFactory.decodeResource(getResources(),R.drawable.harleyquinn);
int picx = (this.getWidth()-picture.getWidth())/2;
int picy = (this.getHeight()-picture.getHeight())/2;
canvas.drawBitmap(picture, picx, picy,null);
picture.recycle();
}
}
}
|
cs |
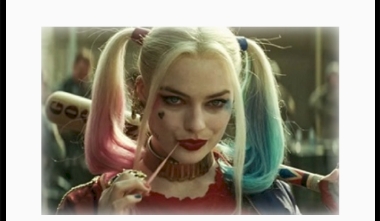
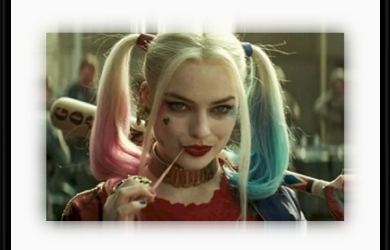
harleyquinn.jpg 라는 파일을 미리 drawble에 붙여 넣어야 합니다.

② 이미지의 기하학적 변환
안드로이드에서 이미지의 이동, 확대, 축소, 회전 등 여러 가지 메소드를 제공합니다.
원리는 이미지 자체에 변환을 가하는 것이 아니라 캔버스에 대해 기하학적 변환을 한 후 이미지 파일을 변환된 캔버스에 출력합니다.
대표적인 canvas 클래스의 기하학적 메소드는 다음과 같습니다.
회전 : rotate()
확대/축소 : scale()
이동 : translate()
기울이기 : skew()
다음은 기본적인 기하학적 변환을 한 예제이며 onDraw() 부분만 코드로 나타낸 것입니다.
나머지 기본적인 틀은 같습니다.
MainActivity.java 의 onDraw()
|
1
2
3
4
5
6
7
8
9
10
11
12
13
14
15
16
17
18
19
20
21
22
|
protected void onDraw(Canvas canvas) {
super.onDraw(canvas);
Bitmap picture = BitmapFactory.decodeResource(getResources(),R.drawable.harleyquinn);
int picx = (this.getWidth()-picture.getWidth())/2;
int picy = (this.getHeight()-picture.getHeight())/2;
int cenx = this.getWidth() /2;
int ceny = this.getHeight() / 2;
canvas.rotate(45,cenx,ceny); // 뷰의 중앙 기준 45도 회전
canvas.drawBitmap(picture, picx, picy, null);
canvas.translate(-150, 200 ); // 캔버스를 x축은 -150 y축은 200만큼 이동시킴
canvas.drawBitmap(picture, picx, picy, null);
canvas.scale(2,2,cenx,ceny); // 캔버스의 축척을 2배 확대함
canvas.drawBitmap(picture, picx, picy, null);
canvas.skew(0.3f, 0.3f); // 캔버스를 0.3만큼 기울임
canvas.drawBitmap(picture, picx, picy, null);
picture.recycle();
}
|
cs |
9~10, 12~13, 15~16, 18~19 각각 실행해서 결과를 확인하면 됩니다.
주석 처리해서 하기
18~19의 결과는 다음과 같습니다.

③ 이미지 활용
포토샵 등의 이미지 처리 응용 프로그램으로 이미지에 다양한 효과를 줄 수 있습니다.
(1) blurring
이미지를 뿌옇게 만들고 효과를 주기 위해서 BlureMaskFilter 클래스를 제공합니다.
블러링 클래스의 생성자는 다음과 같습니다.
BlurMaskFilter(반지름, 스타일);
반지름은 블러링이 될 폭인데 반지름이 클수록 이미지의 가장자리가 크게 블러링 됩니다.
스타일은 NORMARL, INNER, OUTER, SOLID 효과가 있습니다.
다음은 blurring을 이용한 예제입니다.
onDraw() 부분만 나타냈습니다.
MainActivity.java의 onDraw()
|
1
2
3
4
5
6
7
8
9
10
11
12
13
14
15
|
protected void onDraw(Canvas canvas) {
super.onDraw(canvas);
Bitmap picture = BitmapFactory.decodeResource(getResources(),R.drawable.harleyquinn);
int picx = (this.getWidth()-picture.getWidth())/2;
int picy = (this.getHeight()-picture.getHeight())/2;
Paint paint = new Paint();
BlurMaskFilter bmf;
bmf = new BlurMaskFilter(40, BlurMaskFilter.Blur.SOLID);
paint.setMaskFilter(bmf);
canvas.drawBitmap(picture, picx, picy, paint);
picture.recycle();
}
|
cs |


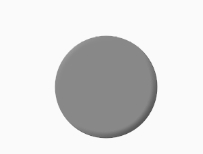
(2) Embossing
엠보싱은 이미지가 볼록하게 튀어나와 보이는 효과를 나타냅니다.
안드로이드에서 엠보싱 효과를 주기 위해서 EmbossMaskFilter 클래스를 제공합니다.
EmbossMaskFilter의 생성자 형식은 다음과 같습니다.
EmbossMaskFilter(빛의 xyz 방향 1차배열, 빛의 밝기, 반사계수, 블러링 크기);
빛의 xyz 방향 1차배열은 {x축, y축, z축 }로 나타냅니다.
빛의 밝기는 0부터 1까지 지정합니다.
반사 계수는 5~8 정도가 적당합니다.
블러링 크기는 볼록하게 표시하기 위한 가장자리의 크기를 나타냅니다.
엠보싱 효과의 onDraw() java 코드는 다음과 같습니다.
|
1
2
3
4
5
6
7
8
9
10
11
12
13
14
|
protected void onDraw(Canvas canvas) {
super.onDraw(canvas);
int cenx = this.getWidth() /2;
int ceny = this.getHeight() /2;
Paint paint = new Paint();
paint.setColor(Color.GRAY);
EmbossMaskFilter emf;
emf = new EmbossMaskFilter(new float[] {3,3,3},0.5f, 7, 20);
paint.setMaskFilter(emf);
canvas.drawCircle(cenx,ceny, 150, paint);
}
|
cs |
만약 잘 보이지 않는다면 AndroidManifest.xml 파일의 <application 안쪽에 android:hardwareAccelerated="false" 를 추가합니다.
(3) ColorMatrix
안드로이드에서 색상이나 밝기를 조절하기 위해 ColorMatrix 클래스와 ColorMatrixColorFilter클래스를 사용합니다.
형식은 다음과 같습니다.
Paint paint = new Paint();
float[] array = {4x5 배열 };
ColorMatrix cm = new ColorMatrix(array);
paint.setColorFilter(new ColorMatrixColorFilter(cm));
canvas.drawBitmap();
4x5 배열의 각 위치 값은 다음과 같습니다.
red(1) 0 0 0 Brightness(0)
0 green(1) 0 0 Brightness(0)
0 0 Blue(1) 0 Brightness(0)
0 0 0 Alpha(1) 0
색상들은 기본적으로 1이 설정되어 있고, 이 값을 배수로 주면 각 색상의 대비(contrast)가 커집니다.
색상을 밝게 하고 싶으면 Brightness에 양수를 입력하고 어둡게 하고 싶으면 음수를 입력합니다.
다음은 예제입니다.
MainActivity.java 의 onDraw()
|
1
2
3
4
5
6
7
8
9
10
11
12
13
14
15
|
protected void onDraw(Canvas canvas) {
super.onDraw(canvas);
Bitmap picture = BitmapFactory.decodeResource(getResources(),R.drawable.harleyquinn);
int picx = (this.getWidth()-picture.getWidth())/2;
int picy = (this.getHeight()-picture.getHeight())/2;
Paint paint = new Paint();
float[] array = { 2,0,0,0,-20,0,2,0,0,-20,0,0,2,0,-20,0,0,0,1,0};
ColorMatrix cm = new ColorMatrix(array);
paint.setColorFilter(new ColorMatrixColorFilter(cm));
canvas.drawBitmap(picture, picx, picy, paint);
picture.recycle();
}
|
cs |

다음은 이미지가 주어지고 버튼을 한 번 누를 때 포토샵처럼 특정 기능이 적용되는 예제입니다.
activity_main.xml
|
1
2
3
4
5
6
7
8
9
10
11
12
13
14
15
16
17
18
19
20
21
22
23
24
25
26
27
28
29
30
31
32
33
34
35
|
<?xml version="1.0" encoding="utf-8"?>
<LinearLayout xmlns:android="http://schemas.android.com/apk/res/android"
xmlns:tools="http://schemas.android.com/tools"
android:layout_width="match_parent"
android:layout_height="match_parent"
android:orientation="vertical">
<LinearLayout
android:layout_width="match_parent"
android:layout_height="0dip"
android:layout_weight="1"
android:gravity="center"
android:orientation="horizontal">
<Button
android:layout_width="wrap_content"
android:layout_height="wrap_content"
android:id="@+id/zoomin"
android:text="확대" />
<Button
android:layout_width="wrap_content"
android:layout_height="wrap_content"
android:id="@+id/rotate"
android:text="회전" />
</LinearLayout>
<LinearLayout
android:layout_width="match_parent"
android:layout_height="0dip"
android:layout_weight="9"
android:gravity="center"
android:id="@+id/picturelayout"
android:orientation="vertical">
</LinearLayout>
</LinearLayout>
|
cs |
MainActivity.java
|
1
2
3
4
5
6
7
8
9
10
11
12
13
14
15
16
17
18
19
20
21
22
23
24
25
26
27
28
29
30
31
32
33
34
35
36
37
38
39
40
41
42
43
44
45
46
47
48
49
50
51
52
53
54
55
56
57
58
59
60
61
62
63
64
65
66
67
68
|
import android.content.Context;
import android.graphics.Bitmap;
import android.graphics.BitmapFactory;
import android.graphics.Canvas;
import android.os.Bundle;
import android.view.View;
import android.widget.Button;
import android.widget.LinearLayout;
import androidx.appcompat.app.AppCompatActivity;
public class MainActivity extends AppCompatActivity {
Button zomminbtn, rotatebtn;
GraphicViewSample graphicview;
static float scalex=1, scaley=1, angle=0;
@Override
protected void onCreate(Bundle savedInstanceState) {
super.onCreate(savedInstanceState);
setContentView(R.layout.activity_main);
setTitle("미니 포토샵");
LinearLayout pictureLayout = (LinearLayout) findViewById(R.id.picturelayout);
graphicview = (GraphicViewSample) new GraphicViewSample(this);
pictureLayout.addView(graphicview); // 레이아웃에 graphicview 위젯 넣기
clickIcons();
}
private static class GraphicViewSample extends View {
public GraphicViewSample(Context context) {
super(context);
}
protected void onDraw(Canvas canvas) {
super.onDraw(canvas);
Bitmap picture = BitmapFactory.decodeResource(getResources(), R.drawable.harleyquinn);
int picx = (this.getWidth() - picture.getWidth()) /2;
int picy = (this.getHeight() - picture.getHeight()) /2;
int cenx = this.getWidth() /2;
int ceny = this.getHeight() /2;
canvas.scale(scalex,scaley,cenx,ceny); // 확대시키는 메소드
canvas.rotate(angle,cenx,ceny); // 회전시키는 메소드
//이 두 메소드를 같이 두는 이유는 설정하는 값들이 계속 누적되어서 진행시키게 하기 위해서 같이 있어야 함
canvas.drawBitmap(picture,picx,picy,null);
picture.recycle();
}
}
private void clickIcons() {
zomminbtn = (Button) findViewById(R.id.zoomin);
zomminbtn.setOnClickListener(new View.OnClickListener(){
public void onClick(View v){
scalex=scalex+0.2f;
scaley=scaley+0.2f;
graphicview.invalidate(); // ondraw() 실행
}
});
rotatebtn=(Button) findViewById(R.id.rotate);
rotatebtn.setOnClickListener(new View.OnClickListener(){
public void onClick(View v){
angle=angle+20;
graphicview.invalidate();
}
});
}
}
|
cs |

'It공부 > 안드로이드' 카테고리의 다른 글
| 11. 어댑터뷰 (0) | 2020.08.27 |
|---|---|
| 10. 액티비티와 인텐트 (0) | 2020.08.26 |
| 8. 파일 처리 (0) | 2020.08.24 |
| 7.메뉴와 대화상자 (0) | 2020.08.23 |
| 6. 고급 위젯 (0) | 2020.08.22 |


